While I've been mostly working towards larger goals on the house, most of which are weeks-long projects, I find it's useful to occasionally take days to knock out the "little things." These are tasks which don't take much time individually and may seem insignificant, but when aggregated, end up accomplishing a good chunk of work that adds to the overall appearance and function of the house. Two "little things" I'll be highlighting below are a downspout repair and dryer vent replacement. Let's start with the downspout.


One day, I heard what seemed like an excessive amount of water dripping off the house from inside. Upon investigating outside, I noticed that there was melting snow pouring through an outlet in the gutter. I therefore went on a hunt to find the missing piece, and luckily I was able to find it still in the yard! It appeared as though the pieces hadn't been fastened together, but were measured properly, so this was a perfect task for my compilation day. All this required was predrilling a couple of holes through where I wanted to fasten the components, some small sheet metal screws, and a ladder to reach. My rain and melting snow is now effectively directed away towards the house, and I don't have to worry about water collecting around the foundation! At some point, when I paint the house, I will go around and repaint the downspouts and trim to be extra fresh.

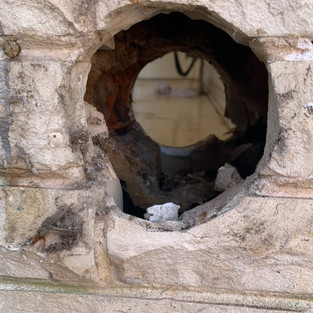
The other little thing I'll feature today ended up being a bit bigger than I had anticipated. The existing dryer vent had a non-removable cage mounted on it, which apparently isn't to code. The technician who replaced my chimney cap was actually going to clean out my dryer vent as well, but instead he told me how to do it and what needed to be corrected, since it would be much cheaper for me to do it myself given the very short length of the run. It seemed easy enough, but I underestimated how difficult it would be to remove the existing steel model which was nailed into the brick. I was able to pull one of the nails out, but had to grind off the others with my Dremmel - the real challenge was doing so without damaging the brick.
After I got the existing piece out, I created an outer sleeve within the wall cavity with thin sheet metal and expanding foam to seal off access to any critters who would like to set up shop in the insulation. I also had to fill and repair a large hole in the drywall on the inside face, which was previously hidden by the sheet metal trim piece surrounding the exhaust duct. After that was completed, I used a hammer drill and masonry screws to attach the new exhaust cap, primed the interior wall, and attached the connection joint where the semi-rigid exhaust off of the dryer will connect to the wall. The last step was to install a latex caulk between the cap and the brick, and it's now good to go! I like the look of the black cap against the house, and will be excited when I can hook up a new dryer to give it a test run! Below is a gallery of some of the progress and after shots. (Don't worry, the caulk will dry clear! And the laundry room walls, floors, and baseboards will eventually be redone, and were thoroughly scrubbed after this series of photos.)
PS. This all could only happen after I removed the existing washer and dyer, which also proved to be more involved than planned (was a bit of a theme for this job). Luckily my parents were over this weekend to help with the labor, so as a group effort we managed to squeeze them out into the garage. The first of several floor scrubs happened afterwards. We also discovered that the laundry hoses leaked, which allowed me to test the theory of whether duct tape can fix everything. The story about the plumber coming later will be for another day.


Comments